After a fresh Windows install, many users overlook privacy setup, leaving personal data exposed. Configuring secure settings immediately ensures that your system remains private and protected from unwanted tracking. This guide will take you through the steps to optimize your Windows install for privacy.
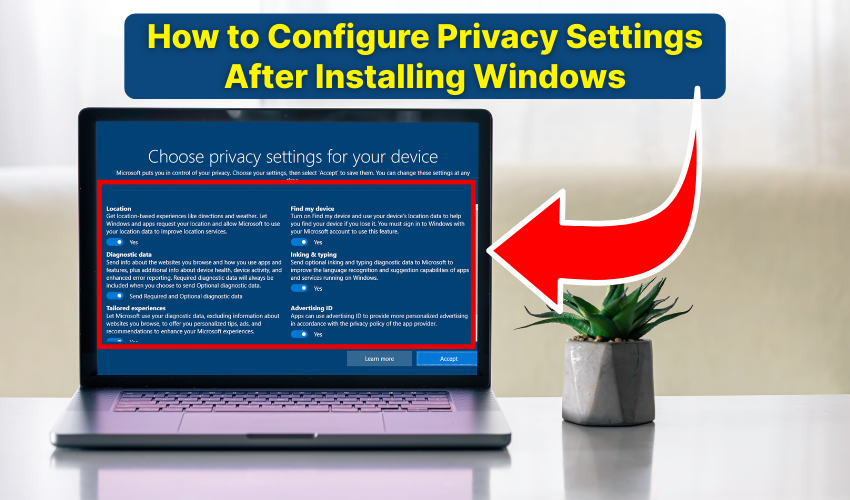
Windows provides a built-in privacy dashboard to manage permissions.
Regularly reviewing this dashboard forms the foundation of privacy setup and ensures your sensitive information stays secure.
Windows collects diagnostic data to improve services. Limiting this data is key to secure settings.
This step is essential in privacy setup to reduce data collection after your Windows install.
Many apps request location access, which may not always be necessary.
Restricting location access is an effective way to maintain secure settings and protect your privacy.
Malware and apps can misuse camera and microphone if permissions are left wide open.
The above-mentioned process strengthens privacy effectively by preventing apps from eavesdropping.
Windows tracks user activity for personalized ads. Limiting this can secure your system further.
These secure settings reduce targeted ads and protect personal behavior data.
Protecting your account is a crucial part of privacy setup.
Using secure settings for login reduces risk if your device is lost or stolen.
Background apps can leak data without your knowledge.
Controlling background activity for Windows privacy setup is important as mentioned above.
Updates patch security flaws, making your system safer.
Regular updates after a Windows install keep your privacy setup strong and your system secure.
By following these steps, you can optimize privacy setup immediately after a Windows install. Adjusting secure settings, controlling app permissions, and enabling safe sign-in options ensures your personal data stays protected. Regular reviews of these settings help maintain privacy and security over time.