Managing internet speed properly and data has become highly essential for both home and office users. Whether you have limited data or are willing to prioritize certain applications, the quick detailed guide explains effective ways to limit internet usage and manage Windows data efficiently.
Windows includes built-in tools to monitor and restrict data usage. Follow these steps to use them:
This great method lets you keep track of Windows data usage and control bandwidth without third-party software. It is ideal for users who want to limit internet usage on metered connections.
Windows allows marking connections as metered to automatically reduce data usage. To apply this:
This easy setting helps Windows limit background data, and is an effective way to reduce bandwidth consumption and limit internet usage without constant monitoring.
Sometimes, specific apps consume most of your bandwidth. Windows Task Manager can help identify and manage them:
This approach allows you to control bandwidth in real-time and helps prevent Windows data overuse.
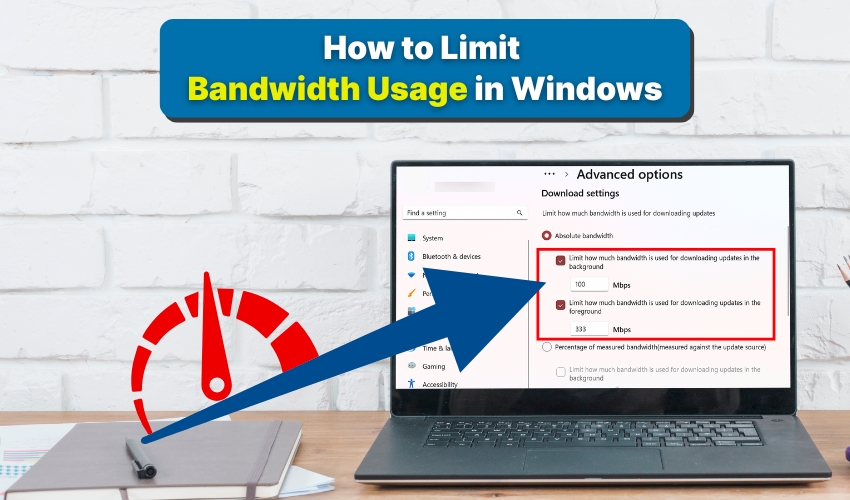
Windows updates often use significant bandwidth. You can limit the amount of data Windows updates consume:
This step is crucial for those who need to limit internet usage during peak hours.
If built-in Windows tools are insufficient, third-party programs can help in such a case in order to manage bandwidth more precisely. Try Applications like NetLimiter or GlassWire allow:
These programs provide advanced options for users who want complete control over their network traffic.
Limiting bandwidth in Windows is as easy as ABC with the tips provided above. You can now control Windows data, manage background apps, and watch network usage in order to avoid extra charges. Checking data often and adjusting settings keeps your internet use balanced. These steps help limit internet usage and keep your network running smoothly.