How to Connect a Printer via Ethernet
Printers play an important role in both homes and offices. When a printer connects by Ethernet cable, it gives speed and reliability better than wireless. An Ethernet printer setup is useful for users who want a steady connection without depending on Wi-Fi signals. This guide explains methods in simple steps to connect a wired printer and make it work as a network printer.
Why Choose Ethernet Printer Setup
A printer connected by Ethernet offers fewer dropouts and faster data transfer. Unlike wireless printers, a wired printer avoids issues of range and interference. Offices prefer Ethernet because many computers can share the same network printer. Home users also benefit when stable printing is needed for work or study.
Method 1: Basic Ethernet Printer Setup
Follow these steps to make your wired printer ready through Ethernet:
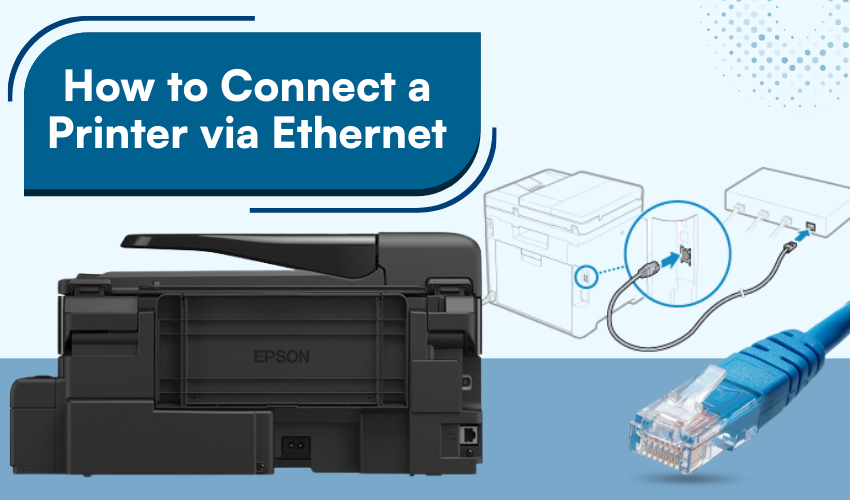
- Check the Ports
- Look at the back of the printer to find the Ethernet port. Most modern wired printer models have one beside the USB port.
- Take a standard Ethernet cable. Make sure it is long enough to reach the router or switch.
- Connect the Printer
- Insert one end of the cable into the printer’s Ethernet port. Plug the other end into a router, switch, or modem port.
- Turn On the Printer
- Switch on the printer and allow it to detect the wired connection. Some printers show a network light that turns solid once connected.
- Install Printer Software
- On the computer, run the setup CD or download drivers from the manufacturer’s site. Choose “network printer” when asked for connection type.
- Print a Test Page
- Once installation finishes, try a test page. The same confirms the Ethernet printer setup has worked.
Method 2: Manual IP Address Assignment
Sometimes a network printer needs a manual IP address for smooth detection. Use these steps:
- Access Printer Menu
- Use the printer’s control panel. Go to the “Network” or “Setup” option.
- Select Wired Settings
- Choose “Ethernet” as connection type for the wired printer.
- Enter IP Address
- Assign a fixed IP address that matches the range of your router. For example, if your router uses 192.168.1.1, assign 192.168.1.50 to the printer.
- Save Settings
- Press OK and let the printer restart.
- Add the Printer on Computer
- Go to “Printers & Scanners” on the computer. Select “Add a printer” and enter the same IP address.
- Check Printing
- Print a sample file to confirm the network printer works properly.
Method 3: Connecting Multiple Computers
A big benefit of Ethernet printer setup is that many devices can print. Follow this method:
- Connect the Printer to Router
- The printer stays connected with Ethernet cable to the main router.
- Ensure All Computers Use Same Network
- Check that laptops and desktops join the same wired or wireless network linked to that router.
- Add the Printer on Each Device
- On every computer, go to “Add printer” and select the detected network printer.
- Confirm Access
- Print a sample page from each computer to ensure all can use the wired printer smoothly.
Tips for Smooth Ethernet Printer Setup
- Keep Ethernet cables away from heavy electrical wires to avoid signal issues.
- Restart router and printer if connection does not appear quickly.
- Update printer firmware regularly for best performance.
- Label the Ethernet port on router to remember which slot the network printer uses.
Conclusion
Setting up an Ethernet printer is an easy and safe way to use a wired printer at home or at the office. With a cable connection, printing becomes faster and has fewer errors than wireless. You can do a basic setup, set an IP address by hand, or connect several computers. All these methods make the printer work well on your network. Once it’s set up, you can print documents, reports, and photos quickly without problems.