Using a wireless mouse and a wireless keyboard can make a desk look clean and help you work without cables getting in the way. Whether for a laptop or desktop, it’s important to set up wireless mouse keyboard the right way so everything works smoothly. This guide explains how to connect these tools using Bluetooth or USB, and what to do if they don’t work at first.
Before you begin, make sure you have the right things ready:
Some Bluetooth input devices come with a USB receiver. Others connect without any extra part, straight through Bluetooth. Check your device to see what type it is.
Put working batteries in the mouse and keyboard. Look for a switch on the back or bottom. Turn both devices on. When ready, a small light might flash to show they’re in pairing mode. If not, press the pairing button if there is one.
Many wireless devices come with a USB stick called a dongle. If you have one:
That’s it! Your Bluetooth input devices will now work. No need to install extra drivers most of the time. This is the easiest way to set up wireless mouse keyboard quickly.
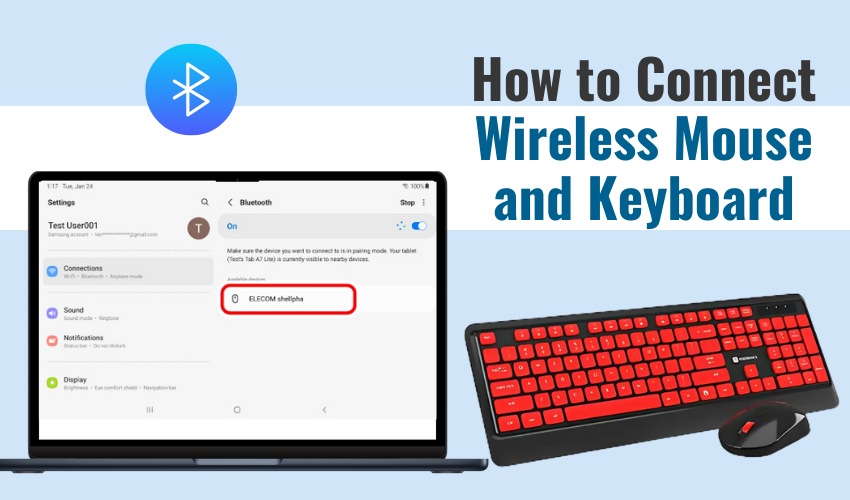
If your devices don’t have a USB receiver, they probably use built-in Bluetooth input. To connect them:
The setup wireless mouse keyboard process might take a few seconds. Once you see “Connected,” the device is ready to use.
Move the mouse and check if the pointer moves. Type something using the keyboard to test it. If both work well, your Bluetooth input devices are now connected.
If not, restart the system and try pairing them again. Sometimes the problem is just a weak signal or wrong settings.
If your mouse or keyboard is not working after you set up wireless mouse keyboard, try these tips:
Also, update your drivers from the Device Manager if nothing works. Older systems may need updated Bluetooth support.
To keep your Bluetooth input devices running well:
A smooth setup wireless mouse keyboard experience can save time daily. Having fewer wires makes your work area neater too.
Setting up a wireless mouse and keyboard is simple if you follow the right steps. Whether through a USB dongle or Bluetooth input, it only takes a few minutes. You don’t need special tools or skills. Just power them on, connect, and start working.
Use these steps every time you need to set up wireless mouse keyboard for a new computer or device. Once done, you can enjoy smooth control without the hassle of cords.