How to test if your webcam is working

webcam test, camera check, webcam troubleshoot
  • By Admin

How to Test if Your Webcam is Working

A working webcam is essential for online meetings, video calls, and streaming. Sometimes, however, your webcam may not function correctly. To avoid disruptions, it is important to perform a webcam test, conduct a camera check, and know how to webcam troubleshoot issues. This simple guide will walk you through methods to ensure your camera works perfectly.

Method 1: Using Built-in Camera Apps

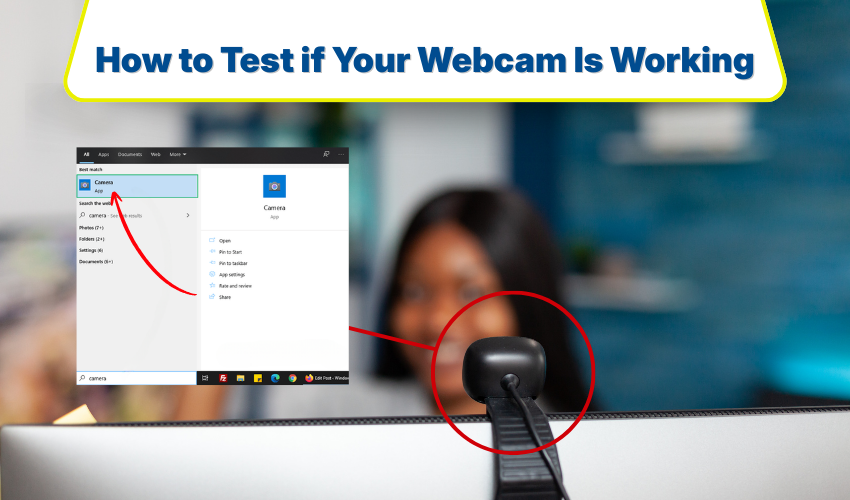
Most computers come with built-in camera apps that allow you to test your webcam quickly.

  1. Open the camera app on your computer. On Windows, search for “Camera” in the Start menu. On Mac, open “Photo Booth.”
  2. Then, allow the app to access your camera if asked.
  3. Look at the preview window. If you see yourself clearly, your webcam is working. This is the simplest webcam test you can perform.
  4. Take a picture or record a short video to ensure both video and audio function properly.

If the camera app does not show a video feed, move on to webcam troubleshoot steps below.

Method 2: Checking Camera Settings in Your Browser

Web applications like Zoom, Google Meet, and Microsoft Teams often require camera access. Performing a camera check in your browser helps confirm that your webcam works online.

  1. Open your preferred browser and go to an online camera test website, such as webcamtests.com.
  2. Click “Start Webcam Test” and allow the site to access your camera.
  3. Observe the preview window. If the video appears, your webcam works for online calls.
  4. Test your microphone by speaking and checking the audio level.

This method is essential if you mostly use your webcam for virtual meetings. It provides both a webcam test and a camera check in one step.

Method 3: Updating Drivers for Webcam Troubleshooting

A common reason a webcam stops working is outdated drivers. Performing a webcam troubleshoot by updating drivers can fix many issues.

  1. Press the Windows key + X and select “Device Manager.”
  2. Expand the “Cameras” or “Imaging Devices” section.
  3. Right-click your webcam and select “Update driver.”
  4. Choose “Search automatically for updated driver software.”
  5. Finally, restart your computer and test your camera again.

After this step, run a webcam test using either the camera app or an online site. If the issue persists, continue with more advanced troubleshooting.

Method 4: Checking Connections and Privacy Settings

Sometimes, webcams may fail due to hardware or privacy settings. A quick camera check can fix these problems.

  1. Ensure the webcam is properly connected if it is an external device.
  2. Check that the lens is clean and not obstructed.
  3. Go to your system’s privacy settings and confirm that apps are allowed to use the camera.
  4. Reopen the camera app and perform another webcam test.

This method often resolves simple problems without the need for technical support.

Method 5: Using Third-Party Software

If built-in apps fail, third-party software can perform a more detailed webcam troubleshoot. Software like ManyCam or OBS Studio can help test multiple camera functions.

  1. Download and install your chosen software.
  2. Open the program and select your webcam.
  3. Test video and audio recording to ensure all functions work.
  4. Adjust settings if the video is blurry or the audio is unclear.

Using these tools gives a thorough webcam test and identifies any technical issues you may need to address.

Conclusion

Checking your webcam often makes sure your video calls run smoothly. Doing a webcam test, a camera check, and basic troubleshooting can fix most problems. Using built-in apps, online tools, driver updates, or other software will help keep your camera ready for any call.

Share :